- 自动化测试框架[Cypress环境搭建与配置详解]
基础环境安装
安装与配置
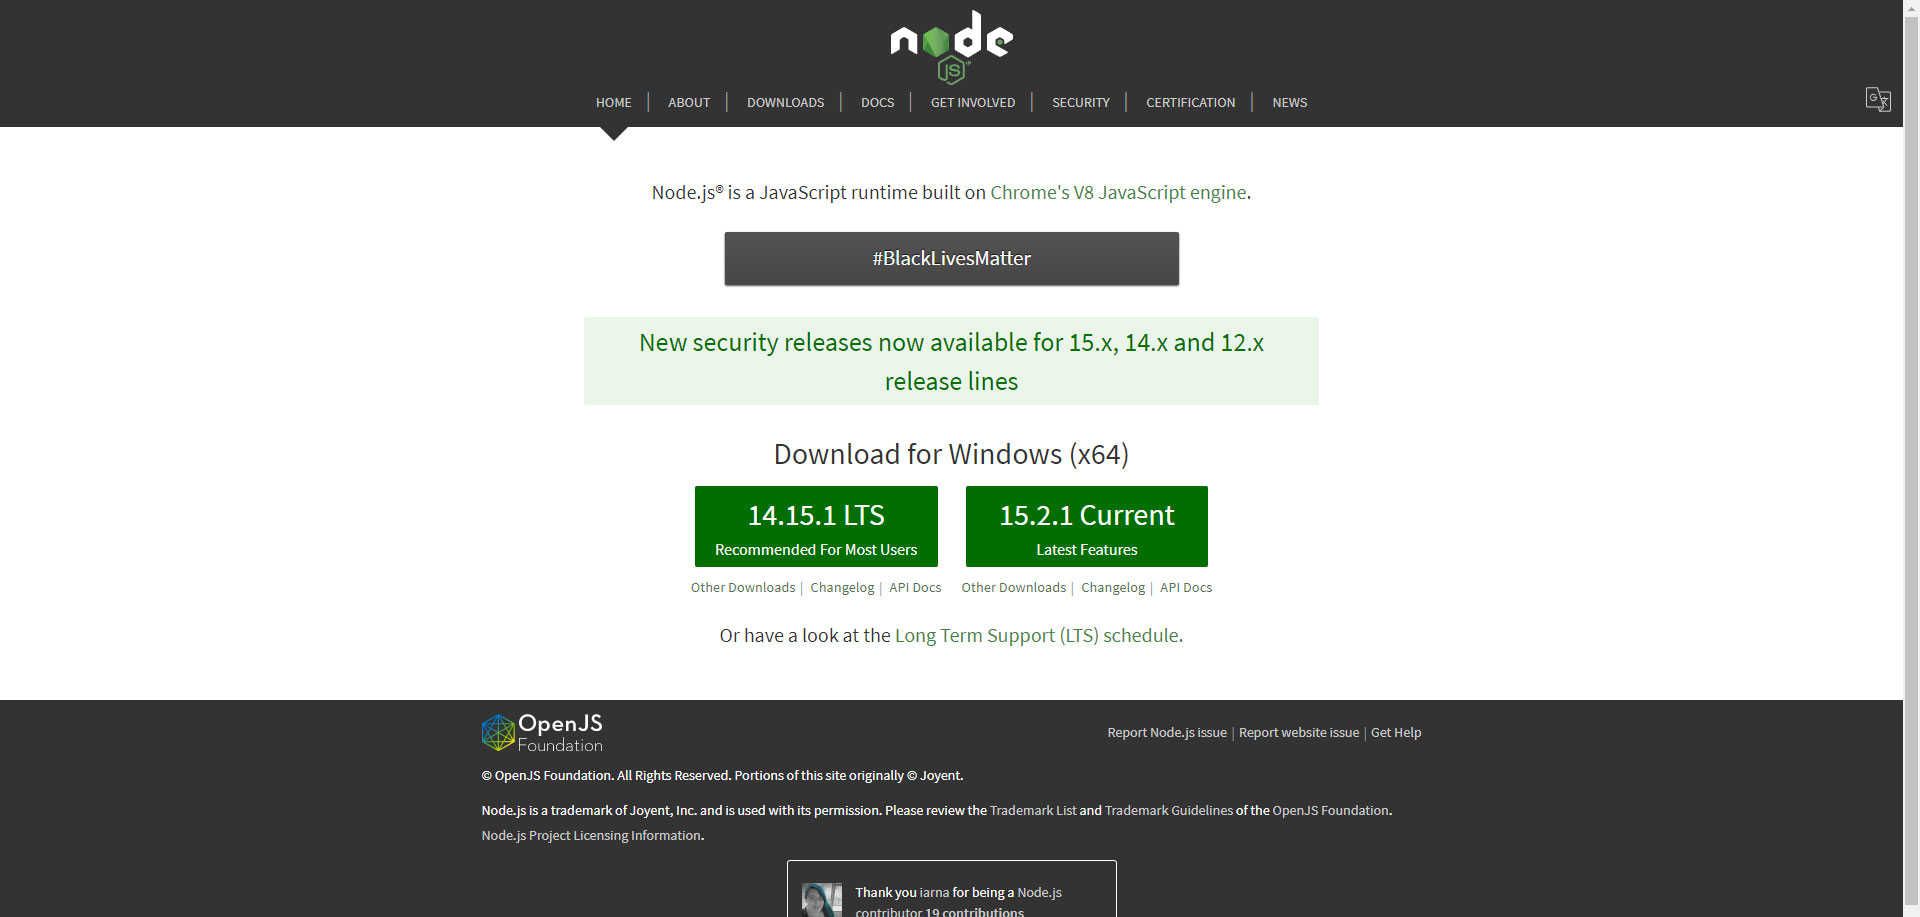
首先从Node.js官网下载node-v14.15.1-x64.msi
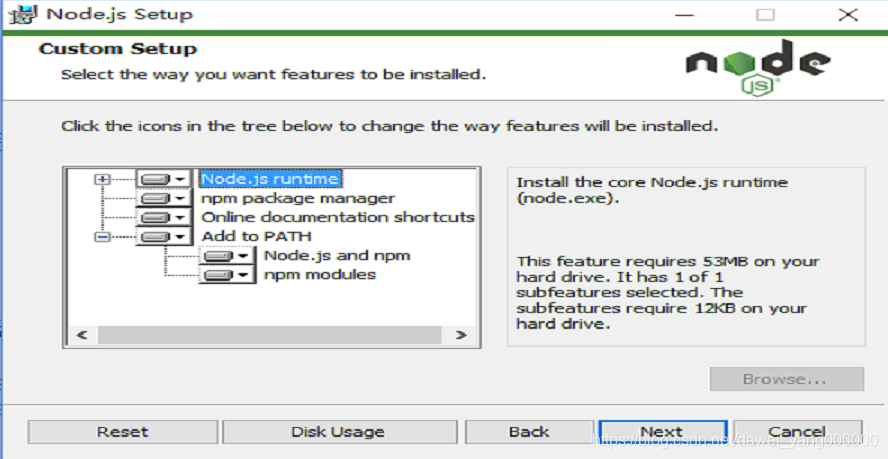
下载完成后,双击安装,在Custom Setup阶段,注意确保添加系统环境变量的选项(Add to PATH)是选中的否则后续还需要自行配制
环境验证
C:\Users\Administrator>node --version
v14.15.1
C:\Users\Administrator>npm --version
6.14.8
Cypress安装与配置
通过npm安装及配置(推荐模式)
新建一个Cypress的文件夹,然后在文件夹内执行命令npm init从而生成package.json文件
使用npm install cypress --save-dev命令安装Cypress
D:\cypress>npm install cypress --save-dev
npm WARN deprecated har-validator@5.1.5: this library is no longer supported
> cypress@5.6.0 postinstall D:\cypress\node_modules\cypress
> node index.js --exec install
Installing Cypress (version: 5.6.0)
  √  Downloaded Cypress
  √  Unzipped Cypress
  √  Finished Installation C:\Users\Administrator\AppData\Local\Cypress\Cache\5.6.0
You can now open Cypress by running: node_modules\.bin\cypress open
https://on.cypress.io/installing-cypress
npm WARN saveError ENOENT: no such file or directory, open 'D:\cypress\package.json'
npm notice created a lockfile as package-lock.json. You should commit this file.
npm WARN enoent ENOENT: no such file or directory, open 'D:\cypress\package.json'
npm WARN cypress No description
npm WARN cypress No repository field.
npm WARN cypress No README data
npm WARN cypress No license field.
+ cypress@5.6.0
added 216 packages from 147 contributors and audited 216 packages in 540.664s
12 packages are looking for funding
  run `npm fund` for details
found 0 vulnerabilities
在D:\cypress\node_modules\cypress目录下会自动生成一个package.json文件,作用是一样的
通过yarn安装及配置
yarn是一个JavaScript包管理工具,它是为了弥补npm的一些缺陷而出现的,通过其官方地址下载yarn-x.xx.x.msi文件,然后双击完成安装即可,然后将yarn的执行文件路径C:\Program Files (x86)\Yarn\bin;配置到系统环境变量中

然后启动命令行验证环境
C:\Users\Administrator>yarn
yarn install v1.22.5
info No lockfile found.
[1/4] Resolving packages...
[2/4] Fetching packages...
[3/4] Linking dependencies...
[4/4] Building fresh packages...
success Saved lockfile.
Done in 0.06s.
C:\Users\Administrator>yarn -version
1.22.5
实际上使用npm也可以安装yarn,命令是npm install -g yarn安装成功后,便可以使用yarn安装cypress,与上一个安装方式一样,新建一个Cypress目录,然后在目录下执行命令yarn add cypress --dev即可
Microsoft Windows [版本 10.0.10240]
(c) 2015 Microsoft Corporation. All rights reserved.
D:\cypress>yarn add cypress --dev
yarn add v1.22.5
info No lockfile found.
warning package-lock.json found. Your project contains lock files generated by tools other than Yarn. It is advised not to mix package managers in order to avoid resolution inconsistencies caused by unsynchronized lock files. To clear this warning, remove package-lock.json.
[1/4] Resolving packages...
warning cypress > @cypress/request > har-validator@5.1.5: this library is no longer supported
[2/4] Fetching packages...
[3/4] Linking dependencies...
[4/4] Building fresh packages...
success Saved lockfile.
success Saved 165 new dependencies.
info Direct dependencies
└─ cypress@5.6.0
info All dependencies
├─ @cypress/listr-verbose-renderer@0.4.1
├─ @cypress/request@2.88.5
├─ @cypress/xvfb@1.2.4
├─ @samverschueren/stream-to-observable@0.3.1
├─ @types/sinonjs__fake-timers@6.0.2
├─ @types/sizzle@2.3.2
├─ ajv@6.12.6
├─ ansi-escapes@3.2.0
├─ ansi-styles@2.2.1
├─ any-observable@0.3.0
├─ arch@2.2.0
├─ asn1@0.2.4
├─ async@3.2.0
├─ asynckit@0.4.0
├─ at-least-node@1.0.0
├─ aws-sign2@0.7.0
├─ aws4@1.11.0
├─ balanced-match@1.0.0
├─ bcrypt-pbkdf@1.0.2
├─ blob-util@2.0.2
├─ bluebird@3.7.2
├─ brace-expansion@1.1.11
├─ buffer-crc32@0.2.13
├─ buffer-from@1.1.1
├─ cachedir@2.3.0
├─ caseless@0.12.0
├─ chalk@1.1.3
├─ check-more-types@2.24.0
├─ ci-info@2.0.0
├─ cli-cursor@2.1.0
├─ cli-table3@0.6.0
├─ cli-truncate@0.2.1
├─ code-point-at@1.1.0
├─ color-convert@2.0.1
├─ color-name@1.1.4
├─ colors@1.4.0
├─ combined-stream@1.0.8
├─ commander@5.1.0
├─ common-tags@1.8.0
├─ concat-map@0.0.1
├─ concat-stream@1.6.2
├─ core-util-is@1.0.2
├─ cross-spawn@7.0.3
├─ cypress@5.6.0
├─ dashdash@1.14.1
├─ debug@4.3.1
├─ delayed-stream@1.0.0
├─ ecc-jsbn@0.1.2
├─ elegant-spinner@1.0.1
├─ emoji-regex@8.0.0
├─ end-of-stream@1.4.4
├─ eventemitter2@6.4.3
├─ execa@4.1.0
├─ executable@4.1.1
├─ exit-hook@1.1.1
├─ extend@3.0.2
├─ extract-zip@1.7.0
├─ extsprintf@1.3.0
├─ fast-deep-equal@3.1.3
├─ fast-json-stable-stringify@2.1.0
├─ fd-slicer@1.1.0
├─ forever-agent@0.6.1
├─ form-data@2.3.3
├─ fs-extra@9.0.1
├─ fs.realpath@1.0.0
├─ get-stream@5.2.0
├─ getos@3.2.1
├─ getpass@0.1.7
├─ glob@7.1.6
├─ global-dirs@2.0.1
├─ graceful-fs@4.2.4
├─ har-schema@2.0.0
├─ har-validator@5.1.5
├─ has-ansi@2.0.0
├─ has-flag@4.0.0
├─ http-signature@1.2.0
├─ human-signals@1.1.1
├─ indent-string@3.2.0
├─ inflight@1.0.6
├─ inherits@2.0.4
├─ ini@1.3.5
├─ is-ci@2.0.0
├─ is-fullwidth-code-point@3.0.0
├─ is-installed-globally@0.3.2
├─ is-observable@1.1.0
├─ is-path-inside@3.0.2
├─ is-promise@2.2.2
├─ is-stream@1.1.0
├─ is-typedarray@1.0.0
├─ isarray@1.0.0
├─ isexe@2.0.0
├─ isstream@0.1.2
├─ json-schema-traverse@0.4.1
├─ json-schema@0.2.3
├─ json-stringify-safe@5.0.1
├─ jsonfile@6.1.0
├─ jsprim@1.4.1
├─ lazy-ass@1.6.0
├─ listr-silent-renderer@1.1.1
├─ listr-update-renderer@0.5.0
├─ listr-verbose-renderer@0.5.0
├─ listr@0.14.3
├─ lodash.once@4.1.1
├─ lodash@4.17.20
├─ log-symbols@4.0.0
├─ log-update@2.3.0
├─ merge-stream@2.0.0
├─ mime-db@1.44.0
├─ mime-types@2.1.27
├─ mimic-fn@1.2.0
├─ minimatch@3.0.4
├─ mkdirp@0.5.5
├─ moment@2.29.1
├─ ms@2.1.2
├─ npm-run-path@4.0.1
├─ number-is-nan@1.0.1
├─ oauth-sign@0.9.0
├─ onetime@2.0.1
├─ ospath@1.2.2
├─ p-map@2.1.0
├─ path-is-absolute@1.0.1
├─ path-key@3.1.1
├─ pend@1.2.0
├─ performance-now@2.1.0
├─ pify@2.3.0
├─ pretty-bytes@5.4.1
├─ process-nextick-args@2.0.1
├─ psl@1.8.0
├─ pump@3.0.0
├─ punycode@2.1.1
├─ qs@6.5.2
├─ querystring@0.2.0
├─ ramda@0.26.1
├─ readable-stream@2.3.7
├─ request-progress@3.0.0
├─ restore-cursor@2.0.0
├─ rimraf@3.0.2
├─ rxjs@6.6.3
├─ safe-buffer@5.1.2
├─ safer-buffer@2.1.2
├─ shebang-command@2.0.0
├─ shebang-regex@3.0.0
├─ slice-ansi@0.0.4
├─ sshpk@1.16.1
├─ string_decoder@1.1.1
├─ string-width@4.2.0
├─ strip-final-newline@2.0.0
├─ supports-color@7.2.0
├─ symbol-observable@1.2.0
├─ throttleit@1.0.0
├─ tmp@0.2.1
├─ tough-cookie@2.5.0
├─ tslib@1.14.1
├─ tunnel-agent@0.6.0
├─ tweetnacl@0.14.5
├─ typedarray@0.0.6
├─ universalify@1.0.0
├─ untildify@4.0.0
├─ uri-js@4.4.0
├─ url@0.11.0
├─ util-deprecate@1.0.2
├─ uuid@3.4.0
├─ verror@1.10.0
├─ which@2.0.2
└─ wrap-ansi@3.0.1
Done in 20.32s.
D:\cypress>
通过直接下载安装及配置
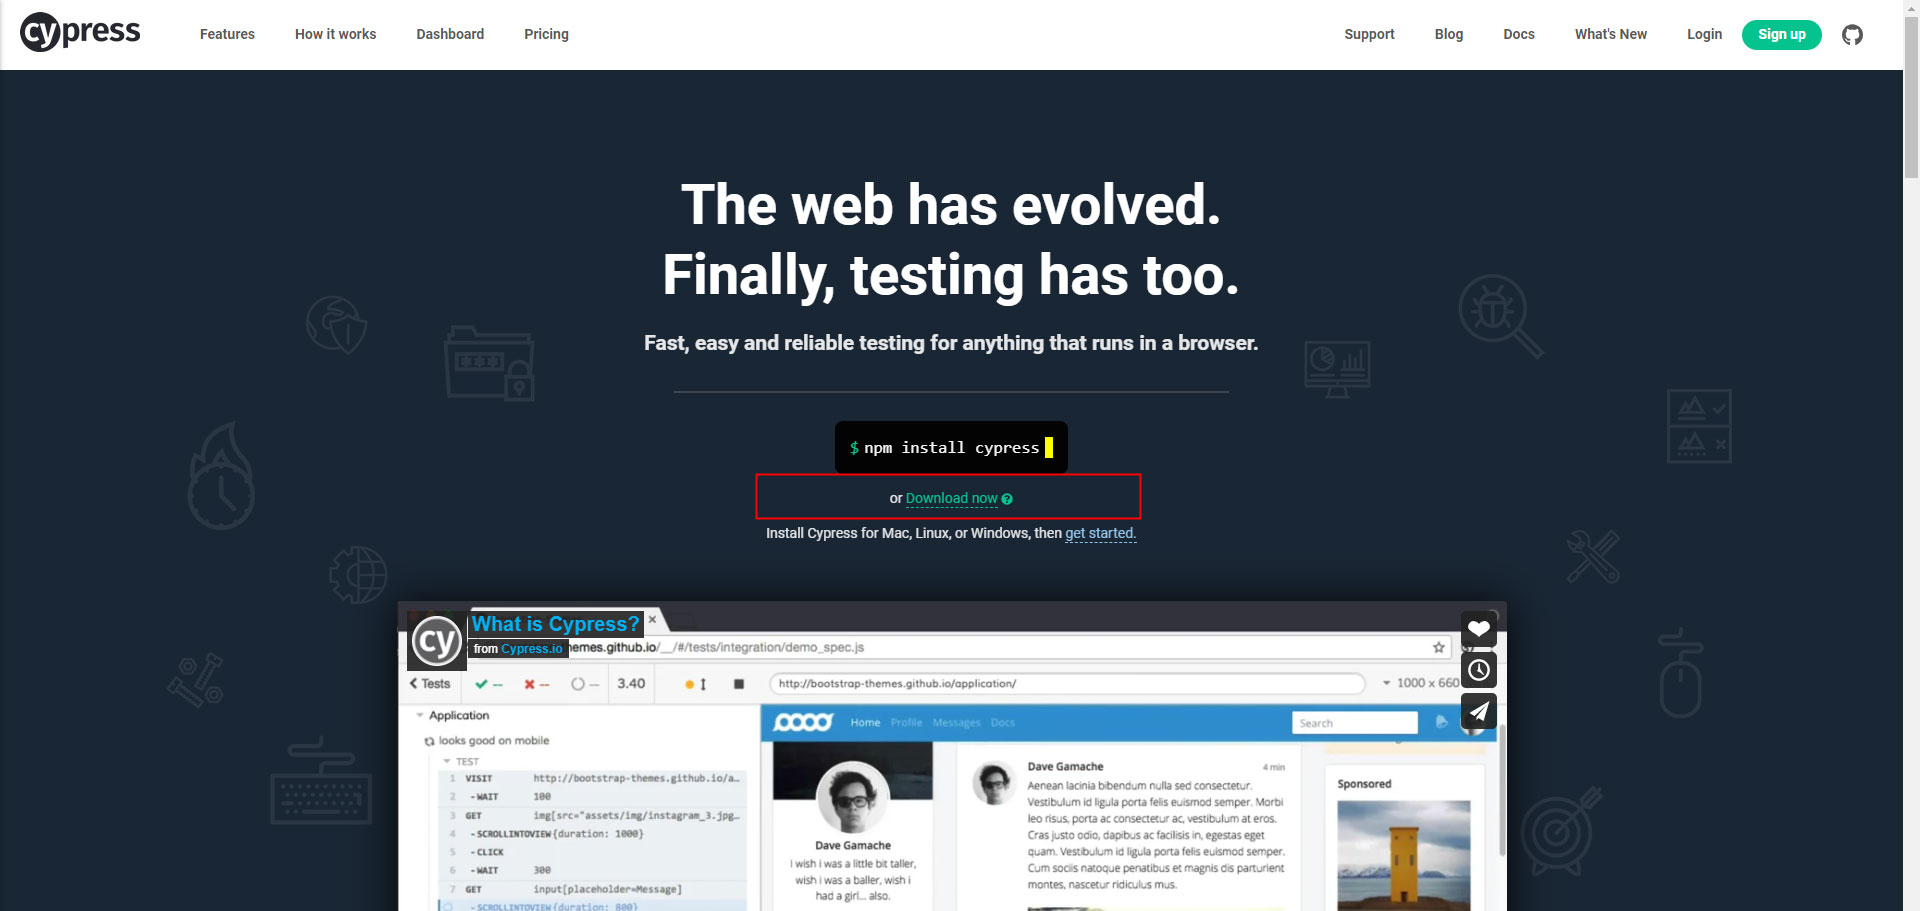
首先从Cypress官网下载Cypress的zip包,从该地址下载的Cypress为最新版本的,如果想获取指定版本的Cypress可以从此地址找对应版本
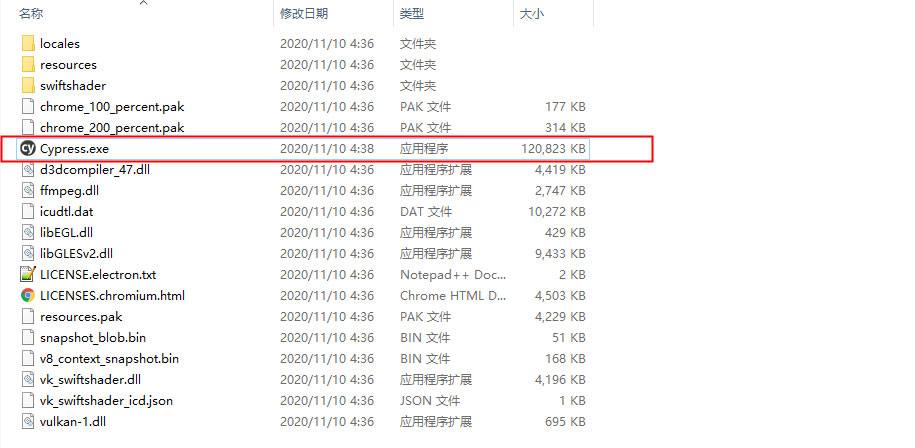
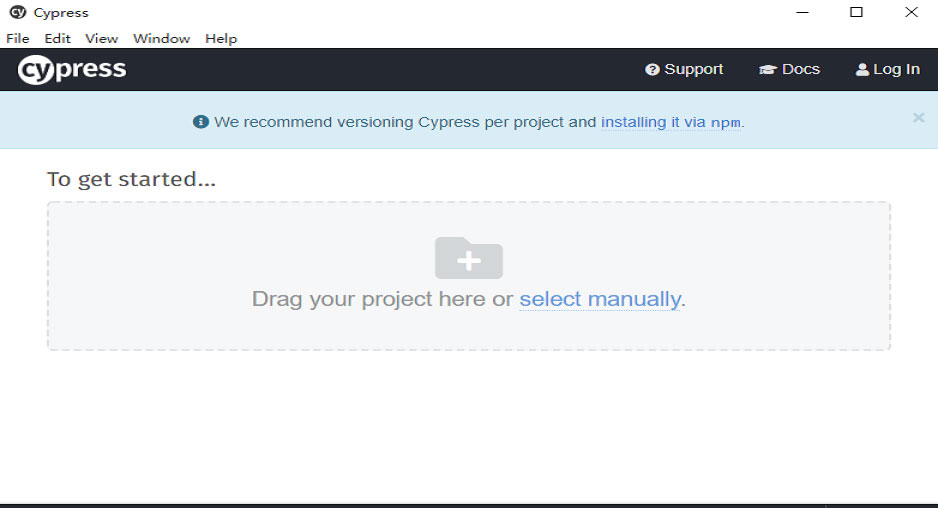
下载解压后,双击.exe文件即可启动Cypress在这里插入图片描述
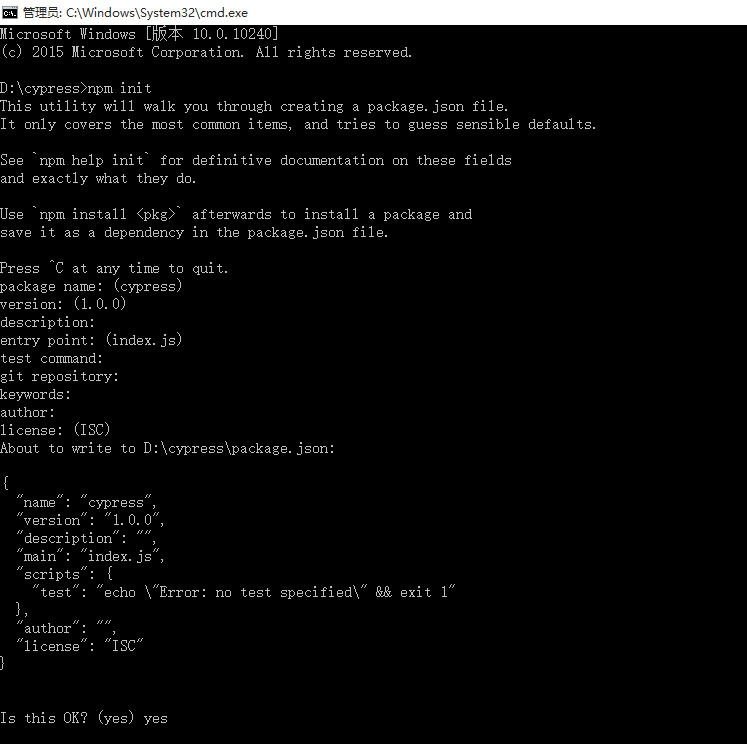
执行npm init命令来生成package.json文件,首先将命令行引导到解压好的cypress目录下,然后执行npm init它会引导你配置生成package.json文件
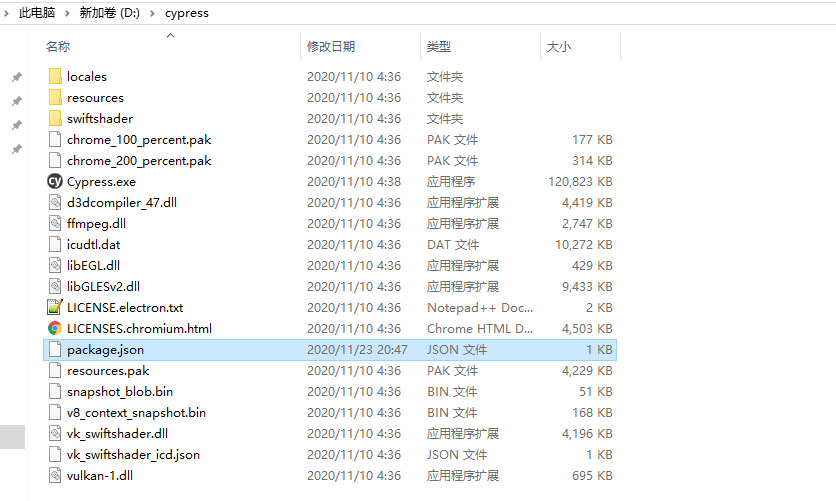
然后在命令行所在路径下就会生成package.json文件

package.json文件也可以手动创建,通常存在于项目的根目录下,它定义了这个项目所需要的各种模块及项目的各项配置信息,例如名称、版本、依赖、脚本等等
使用直接下载的方式存在 一些麻烦,官方给出的说明如下
Recording runs to the Dashboard is not possible from the direct download. This download is only intended as a quick way to try out Cypress. To record tests to the Dashboard, you’ll need to install Cypress as an npm dependency.
启动Cypress
执行cypress open启动Cypress
```bash
D:\cypress\node_modules\.bin>cypress open
It looks like this is your first time using Cypress: 5.6.0
√  Verified Cypress! C:\Users\Administrator\AppData\Local\Cypress\Cache\5.6.0\Cypress
Opening Cypress...
```
此时在打开的窗口可能会遇到报错,报错内容类似于Error: EEXIST: file already exists, mkdir 'C:\cypress\node_modules\.bin\cypress'
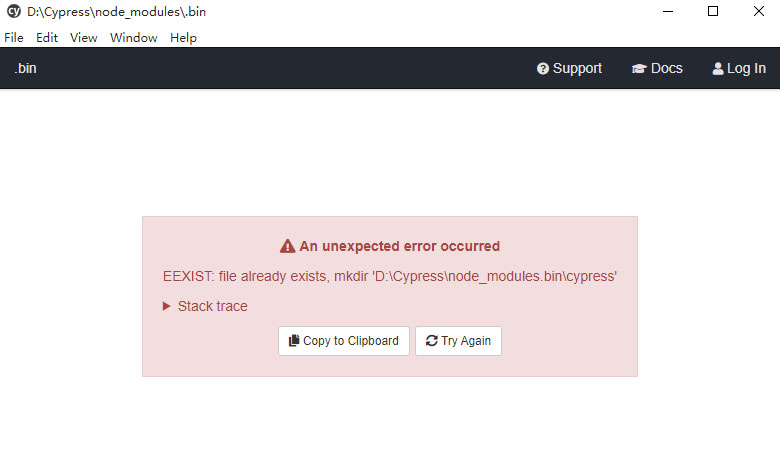
这种情况下找到C:\cypress\node_modules.bin\下的cypress文件,将其改名,然后再执行命令就可以了
如果启动Cypress的时候,缺少依赖等等错误,可以尝试重新安装Cypress,命令如下
.\node_modules\.bin\cypress.cmd install --force
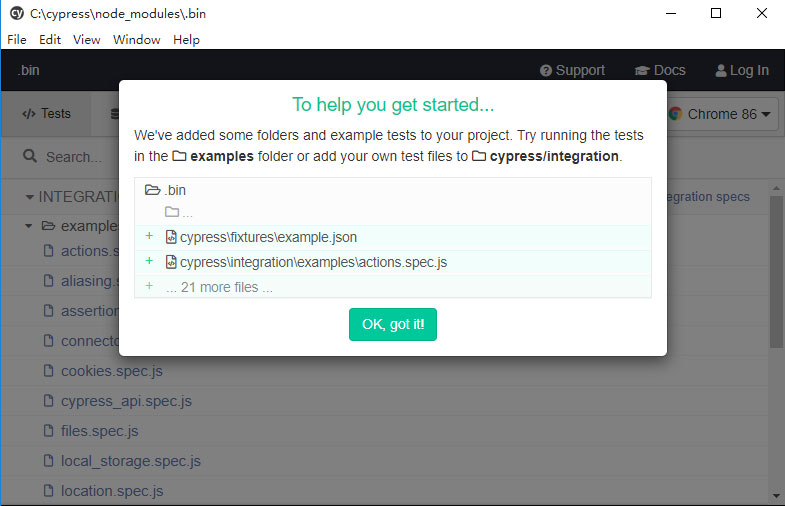
执行npm run cypress:open启动Cypress
在package.json文件中添加脚本
{
  "scripts": {
    "cypress:open": "cypress open",
    "cypress:run":"cypress run",
  }
}
然后执行npm run cyrepss:open即可
D:\Cypress>npm run cypress:open
> cypress@1.0.0 cypress:open D:\Cypress
> cypress open
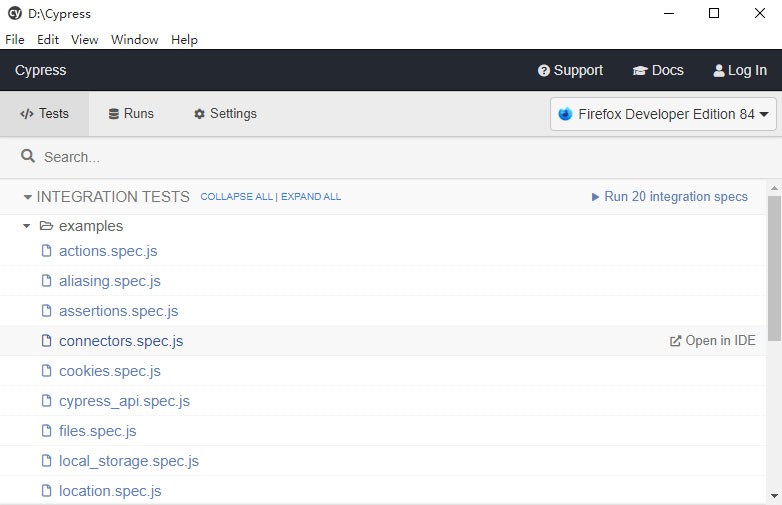
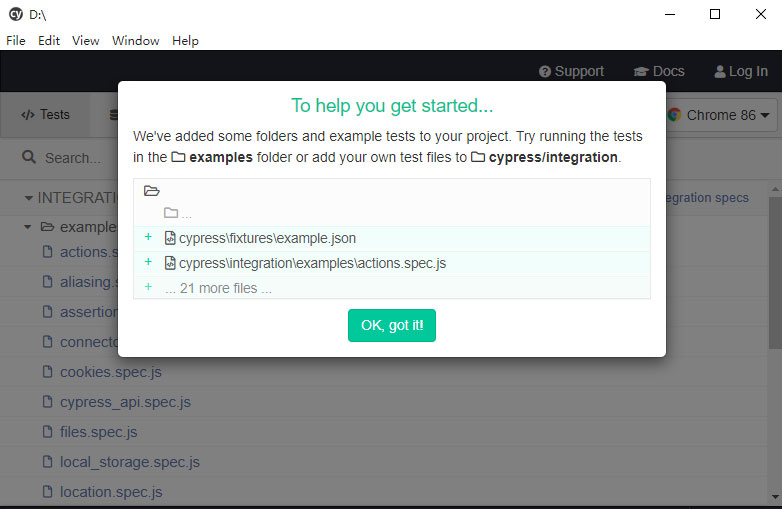
执行npx cypress open启动Cypress
npm从5.2开始增加了npx命令,主要用于提升从npm注册表使用软件包的提前,它会随着npm自动安装,当然也可以手动安装
bash D:\>npx cypress open
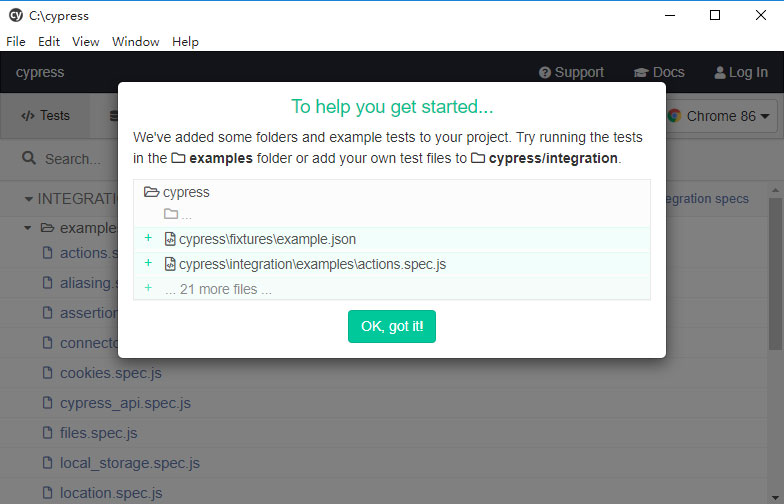
执行yarn run cypress open启动Cypress
如果是使用yarn命令安装的Cypress,那么还可以通过执行yarn run cypress open启动Cypress
C:\cypress>yarn run cypress open
yarn run v1.22.5
$ C:\cypress\node_modules\.bin\cypress open
直接启动.exe文件
如果是下载的windows版本的,那么它包含一个.exe文件,双击即可启动
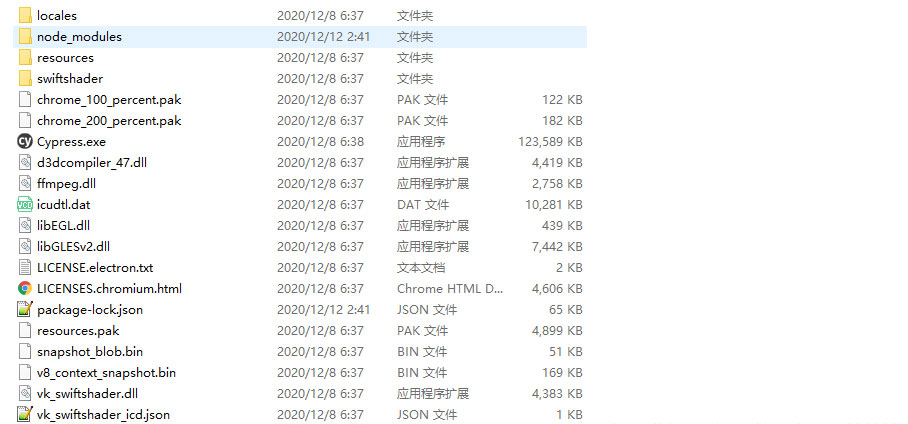
配置Cypress
在package.json文件中,增加启动命令,如下所示
{
  "name": "davieyang",
  "version": "1.0.0",
  "description": "trainning",
  "main": "index.js",
  "scripts": {
"cypress:open": "cypress open",
"cypress:run": "cypress run",
    "test": "echo \"Error: no test specified\" && exit 1"
  },
  "author": "",
  "license": "ISC"
}
然后再启动和运行cypress的时候便可以直接使用命令
yarn cypress:open
yarn cypress:run
作者:Davieyang.D.Y
原文链接:https://davieyang.blog.csdn.net/article/details/110004314
- 0.00 查看剩余0%
- 【留下美好印记】赞赏支持
- 推荐阅读
- 换一换
- 51Testing软件测试网正在收集测试行业问卷结果,如果你也想为测试行业的前景助力,就点击下方的链接提交答案吧,还有精美礼品等你拿(测试课程五选二)。链接:http://vote.51testing.com/ 本人在今年互联网大环境如此严峻的情况下,作为一个刚毕业不到一年的初级测试,赶在“金九银十”依然拿到了一些面试机会,并且成功拿下4家公司的offer,其中不乏互联网大厂,而且最高总包给到了接近double(无炫耀的意思 〒▽〒)~ 确定好要签的offer后,我决定来复盘一下这波求职的成功原因,也给身处迷茫期的测试朋友提供一个参考,同时抛砖引玉~ 其实我认为最根本的原因是我迅速完...
-
- 双面水滴:以慈善之名,行生意之事——软件测试圈12-1512月6日,健康保障科技平台水滴公司发布了2022年第三季度财报。根据财报,水滴公司的总营收为7.722亿元,较2021年第三季度的7.793亿元同比下降0.91%;归属于水滴公司的净利润为1.696亿元,而2021年第三季度的净亏损为4.770亿元。值得一提的是,虽然水滴公司的净利润较2021年第三季度扭亏,但整体业绩情况并不乐观,尤其是其总营收已连续五个季度出现了同比下降的情况,从2021年第三季度至2022年第三季度,水滴公司的总营收分别同比下降9.7%、27.27%、26.57%、25.33%和0.91%。净利润算是较为亮眼的指标之一,根据历年财报,水滴公司在2018年至2021年的净...
- 持续集成测试总结09-272017年8月开始接手做持续集成平台的工作,该平台包含打包发布,每日构建,稳定测试。做这个的初衷是为了能够提早的暴露出问题,同时使开发在打包上尽可能少出错,提高效率。首先收集现状,源码管理混乱,底层打包空间共用,apk打包在本地,没有稳定性测试,专项测试。需求整理,需要做源码管理,分离底层共用的空间,打包统一使用服务器打包,增加自动化测试,稳定性测试,专项测试。下面说下我们的每日构建跟稳定性测试:客户端每日构建1.1、单元测试单元测试主要是由开发负责编写的,主要是因为开发对产品更加的了解,同时测试开发团队人太少了,要做的事情好多,优先做其他的。关于框架选择,最初想要使用的方案是robolect...
- 上一章我们剖析了如何修炼自身面试情商,避免在面试中触礁。不过,江湖险恶,面试场上总会偶遇各类“特色鲜明”的面试官。比如说,在加入蚂蚁之前,本人也曾与某二线互联网车企的面试官上演了一段有趣的小插曲: “哟,您的经验挺丰富啊,技术水平看着也蛮不错的,还有出版书籍的经历呐?” 那时年少轻狂的我,瞬间接招:“哎呀,您真是高手啊,我也正期待拜读您的大作呢,到时候可别忘了给我打电话通知一声。”随后潇洒转身,扬长而去。 随着自己升级为面试官,接触了更多同仁和面试场景后,我发现每位面试官都有自己独特的性格色彩,甚至同一面试官在不同时间和情绪状态下也会呈现出迥异的面试风格。 “暖男”式面试官的“温柔...
-
- 概述 为提高研发代码质量,我们在处理研发 BUG 的时候不能只满足于修复,还要主动分析 BUG 原因,以便在未来的开发中避免重复错误 规则 【强制】解决 QA 提的 bug 时,必须填写 BUG 原因,选项说明如下表所示:作者:Erik Dietrich 来源:http://www.51testing.com/html/61/n-4477561.html

-
- 关于我们 联系我们 版权声明 广告服务 站长统计
- 建议使用IE 11.0以上浏览器,800×600以上分辨率,法律顾问:上海兰迪律师事务所 项棋律师
- 版权所有 上海博为峰软件技术股份有限公司 Copyright©51testing.com 2003-2024, 沪ICP备05003035号
- 投诉及意见反馈:webmaster@51testing.com; 业务联系:service@51testing.com021-64471599-8017

- 51testing软件测试圈微信


